Building your own skateboard can be a rewarding and personalized experience. Not only does it allow you to tailor the board to your preferences, but it also gives you a sense of accomplishment when you ride on something you’ve created.
In this guide, we will break down the essential components and steps required to build a skateboard from scratch.
You Need The Following Components:
Here are the necessary components you need to build a skateboard:
- Deck
- Grip Tape
- Trucks
- Wheels
- Bearings
- Hardware
- Risers
- Tools
Deck:
The deck is the main platform of the skateboard. It is typically made of seven layers of maple wood glued together. Decks come in various shapes, sizes, and graphics. Choose a deck that suits your riding style and aesthetic preferences.
Grip Tape:
Grip tape is applied to the deck’s surface to provide traction for your shoes. It’s a coarse, sandpaper-like material that enhances your grip and control over the skateboard. Griptape also comes in different colors and designs, allowing for personalization.
Trucks:
Trucks are the metal T-shaped components mounted underneath the deck. They consist of a baseplate, kingpin, hanger, and bushings. Trucks influence the board’s turning ability and stability. Choose trucks that match the width of your deck.
Wheels:
Skateboard wheels come in various sizes, hardness levels (durometer), and shapes. Softer wheels (78A-87A) provide a smoother ride, while harder wheels (88A-101A) offer better durability and are suitable for tricks. Consider the terrain you’ll be riding on when selecting wheels.
Bearings:
Bearings are small metal or ceramic rings placed inside the wheels, allowing them to spin freely. ABEC ratings (1-9) indicate the precision of the bearings. Higher ABEC ratings generally imply smoother and faster rolling. Ensure your bearings are compatible with the skateboard wheels you choose.
Hardware:
Hardware consists of bolts and nuts used to attach the trucks to the deck. It’s crucial to use the right size hardware, matching the thickness of your deck.
Risers:
Risers are optional rubber pads placed between the trucks and the deck. They absorb shocks and vibrations, reducing stress on the deck. Risers also prevent wheel bite, which occurs when the wheels come into contact with the deck during sharp turns.
Tools:
To assemble your skateboard, you’ll need a skate tool or a set of wrenches. Ensure you have the right size tools for adjusting trucks and attaching hardware.
Steps to Build Your Skateboard:

So, now that you have all the necessary components let’s get started on building your skateboard:
Step 1: Gather Your Materials
Before you begin, ensure you have all the necessary components and tools:
- Deck
- Grip Tape
- Trucks
- Wheels
- Bearings
- Hardware
- Risers (optional)
- Skate tool or wrenches
Step 2: Prepare Your Workspace
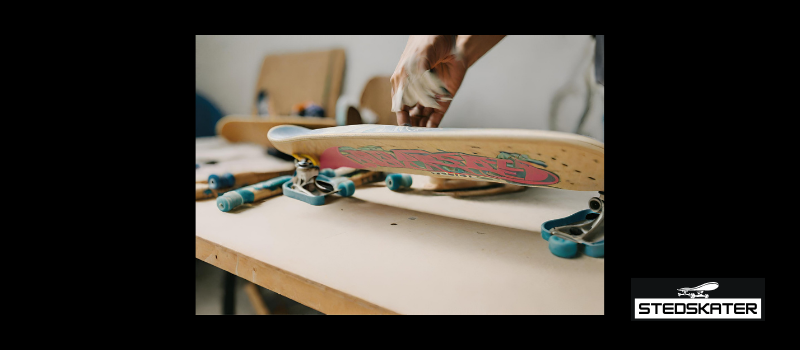
Choose a clean, flat surface with ample space. Gather your components and tools, ensuring good lighting for better visibility.
Step 3: Apply Grip Tape
- Peel Backing:
- Peel off the backing of the grip tape, exposing the sticky side.
- Align and Apply:
- Align one edge of the grip tape with the skateboard deck’s edge. Slowly lay down the grip tape, smoothing out any bubbles or wrinkles as you go.
- Press and Trim:
- Press the grip tape firmly onto the deck. Use a skate tool or the edge of a screwdriver to press along the edges. Trim the excess grip tape with a razor, following the edge of the deck.
Step 4: Create Grip Tape Design (Optional)
If you want to customize your grip tape:
- Sketch Design:
- Sketch your desired design on the back of the grip tape with a pencil.
- Cut Out Design:
- Carefully cut out the design using the razor, taking your time to ensure precision.
Step 5: Attach Trucks
- Align Trucks:
- Place the trucks on the deck, aligning them with the pre-drilled holes. Make sure the kingpin faces towards the center of the deck.
- Add Hardware:
- Insert the bolts through the truck and deck holes. Add risers if desired. Place nuts on the underside of the deck and tighten them securely using a skate tool or wrench.
Step 6: Install Wheels
- Insert Bearings:
- Insert bearings into each wheel. Press them down using your fingers or a skate tool.
- Mount Wheels:
- Place the wheels onto the trucks’ axles, ensuring the bearings are properly seated. Add speed washers on each side of the wheels.
- Tighten Axle Nuts:
- Tighten the axle nuts using a skate tool until snug. Avoid overtightening to allow the wheels to spin freely.
Step 7: Adjust Trucks (Optional)
- Loosen or Tighten Kingpin Nut:
- Use a skate tool to adjust the tightness of the kingpin nut on each truck. Experiment with different levels of tightness to find your preferred balance.
Step 8: Final Check
- Inspect Components:
- Double-check that all components are securely attached. Ensure there are no loose bolts or nuts.
Step 9: Personalize and Ride
- Add Personal Touch:
- Customize your skateboard with stickers, paint, or additional accessories.
- Safety Check:
- Before riding, ensure everything is secure and safe.
- Enjoy Your Ride:
- Hit the streets and enjoy the skateboard you’ve built to your liking.
By following these step-by-step instructions, you’ll successfully assemble a skateboard tailored to your preferences and ready for an exciting ride.
Conclusion:
Riding a skateboard is not just about the tricks and stunts; it’s also about the process of creating your own unique board. From choosing the right components to assembling them together, building a skateboard is an exciting and fulfilling experience.
Remember to always take safety precautions when riding your skateboard. Wear protective gear, such as a helmet and knee pads, and practice in safe areas until you feel confident. With time and practice, you’ll become a skilled skateboarder and enjoy the thrill of riding your own custom-built board.
![Why do skateboarders hate scooters? [Reasons + Tips] Why do skateboarders hate scooters? [Reasons + Tips]](https://bedoper.site/wp-content/uploads/2023/04/Why-do-skateboarders-hate-scooters-150x150.png)


![How fast do skateboards go downhill? [90 mph (145 km/h)] How fast do skateboards go downhill? [90 mph (145 km/h)]](https://bedoper.site/wp-content/uploads/2023/04/How-fast-do-skateboards-go-downhill-150x150.png)
